RSS

Better Than the Super Bowl Peanut Butter Torte

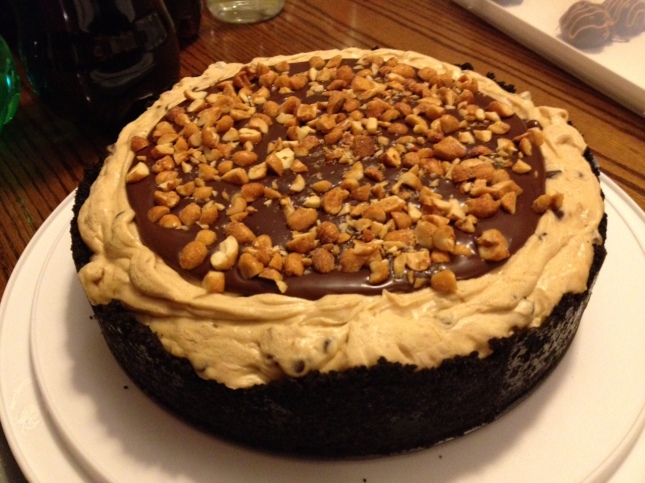
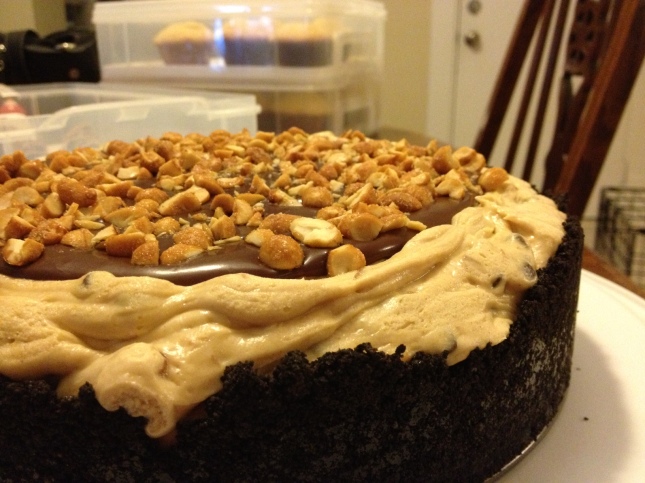
So, the Super Bowl happened a week or so ago. I can’t really remember because other than the blackout, that was about the most boring Super Bowl ever. Though, I guess I should complain because the new Beyonce photo-oops came out of it…and there was the Puppy Bowl with hedgehog cheerleaders. Did you read that? HEDGEHOG CHEERLEADERS! It was beyond adorable. Anyway, we went to a party for the “game”. I was told to bring cornbread and something that combined peanut butter and chocolate. I love these friends, cause they asked for the two types of food I love beyond all else. I guess I should start with the most impressive of the things I brought…Peanut Butter Torte.

Words cannot describe this joy, only guttural grunts of pleasure.

Words cannot describe this joy, only guttural grunts of pleasure.

This recipe was adapted from Annie’s Eats, more like almost directly from Annie’s Eats. I did not even change the directions; she just writes them so clearly! This woman is awesome and I suggest you give her site a visit; it is well worth it. The torte was awesome, obviously! It has a lovely creamy texture with a surprising crunch of peanuts and chocolate in it. I think the only thing I changed from the original recipe was that I used honey-roasted peanuts instead of salted peanuts. I have a big sweet tooth. The torte got rave reviews and was enjoyed by all!

Aaron took this one!!!

Aaron took this one!!!

Peanut Butter Torte
Adapted from Annie’s Eats

Ingredients

For the crust:
32 Oreo cookies, finely processed into crumbs
5 1/3 tbsp. unsalted butter, melted and cooled
Small pinch of salt

For the crunch:
½ cup honey-roasted peanuts, finely chopped
½ cup mini chocolate chips
2 tsp. sugar
½ tsp. espresso powder
¼ tsp. ground cinnamon
Dash of ground nutmeg

For the filling:
2 cups heavy cream
1¼ cups confectioners’ sugar, sifted
12 oz. cream cheese, at room temperature
1½ cups creamy peanut butter (not natural)
2 tbsp. whole milk
¼ cup honey-roasted peanuts, finely chopped

For the topping:
½ cup heavy cream
4 oz. bittersweet chocolate, finely chopped
½ cup  honey-roasted peanuts, finely chopped

Directions

1. To make the crust, preheat the oven to 350° F. Butter a 9-inch springform pan and place it on a baking sheet. Combine the Oreo crumbs, melted butter and salt in a small bowl. Toss with a fork to moisten all of the crumbs. Press into a thin layer covering the bottom and sides of the springform pan. Freeze the crust for 10 minutes. Bake in the preheated oven for 10 minutes, then transfer to a wire rack and let cool completely before filling.

2. To make the crunch, in another small bowl combine ½ cup of the chopped peanuts, mini chocolate chips, sugar, espresso powder, cinnamon and nutmeg. Toss with a fork to mix and set aside.

3. To prepare the filling, in the bowl of a stand mixer fitted with the whisk attachment, whip 2 cups of the cream until it holds medium peaks. Beat in ¼ cup of confectioners’ sugar and whip until the cream holds medium-firm peaks. Scrape the cream into a separate bowl and refrigerate until needed.

4. Wipe out (do not wash) the mixer bowl, replace the whisk with the paddle attachment, and beat the cream cheese with the remaining 1 cup of confectioners’ sugar on medium speed until the cream cheese is satiny smooth. Beat in the peanut butter, whole milk, and ¼ cup of the chopped peanuts until well combined.

5. Using a large rubber spatula, gently stir in about 1/4 of the whipped cream just to lighten the mousse. Still working with the spatula, stir in the crunchy peanut mixture, then gingerly fold in the remaining whipped cream. Scrape the mousse into the crust, mounding and smoothing the top. Refrigerate for at least 4 hours or overnight; cover with plastic wrap as soon as the mousse firms.

6. To finish the torte, put the chopped chocolate in a heatproof bowl set over a saucepan of simmering water. Leave the bowl over the water just until the chocolate softens and starts to melt, about 3 minutes; remove the bowl from the saucepan. Bring the ½ cup of cream to a full boil. Pour the cream over the chocolate and, working with a rubber spatula, very gently stir together until the ganache is completely blended and smooth.

7. Pour the ganache over the torte, smoothing with a metal icing spatula. Scatter the peanuts over the top and chill to set the topping, at least 20 minutes. When the ganache is firm, remove the sides of the springform pan. Refrigerate until ready to serve.

Amaze everyone!
 
Leave a comment

Posted by on February 11, 2013 in Cake, Chocolate, Dessert, Peanut Butter


Cold Day Pork Cassoulet

It has been cold. This should come as no shock to most, if not all of you. This of course means I have been making lots of soups, stews and chilies (Is that honestly the plural of chili? Spell check says so; must be true). Though, I have to admit that it hit 72 degrees in St. Louis the other day, but it is cold again now.

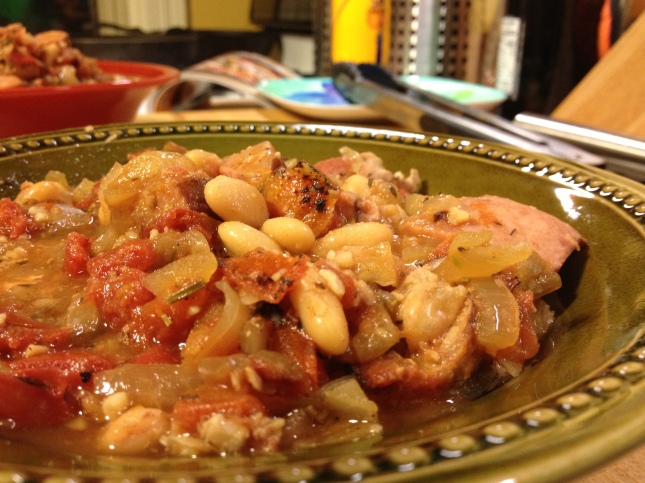
Look at that piggy goodness!

Look at that piggy goodness!

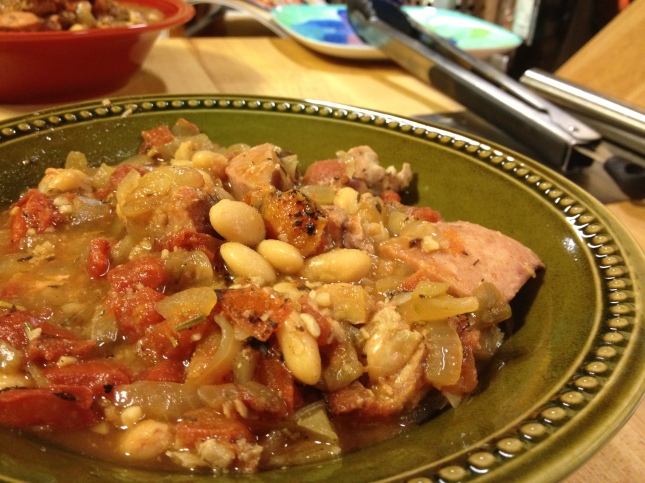
I have been rather busy recently keeping to a pretty rigorous exercise regimen and actually writing my dissertation. I have over 3 pages of that done! Small start I know, but every single word is one step closer to being finished. Anyway, with those two big time sucks, I have been using and abusing my slow cooker. I recently purchased a slow cooker cookbook with nothing but low-cal meals. On what I knew would be a particularly cold day, I decided to try out the pork cassoulet. This meal has pork three different ways: bacon, smoked pork sausage and pork tenderloin and it is somehow still low-cal! If you are like me, you get frequent desires for meat, you may choose to view that as a double entendre or not. But seriously, I will often feel an intense need for more protein in my diet often the day after some heavy weightlifting. This meal definitely satisfies that craving. It is incredibly hearty without making you feel heavy. The ingredients are actually pretty simple but it is full of flavor. And literally, after frying up a couple slices of bacon, you cut up the rest of the ingredients, bung ‘em all in the slow cooker, turn it on low and come back 5 hours later to the perfect post weightlifting winter meal. It goes great with some nice, crusty bread, though I served it with some leftover low-cal corn muffins (recipe to come). So, on your next cold day or perhaps for the Super Bowl, make a pork cassoulet. Ha! That rhymed, and it is only 249 calories per 1 cup serving!

And again!

And again!

Smoked Sausage Cassoulet
Adapted from Cooking Light: Slow Cooker Tonight

Ingredients
2 bacon slices
2 cups chopped onion (2 medium onions)
1 teaspoon dried thyme
½ teaspoon dried rosemary
4-5 garlic cloves minced
½ teaspoon salt
½ teaspoon black pepper – I put in more because I love black pepper
2 (14.5 oz) cans diced tomatoes
2 (15 oz) cans Great Northern beans, rinsed and drained
1 lb lean bonless pork tenderloin trimmed of all visible fat and cut into 1 inch cubes
½ lb reduced fat smoked sausage cut into ½ inch cubes
8 teaspoons grated Parmesan cheese
8 teaspoons chopped fresh flat leaf parsley

Directions

1. Cook bacon in large skillet until crisp. Remove bacon and place on towels to drain grease. When cool enough to handle crumble it up into little bits. Do NOT get rid of grease in pan.

2. Add onion, thyme, rosemary and garlic to the bacon drippings in pan and sauté until the onions are tender. Stir in bacon, salt, pepper and tomatoes. Bring to boil and remove from heat.

3. Place half the beans in a large bowl and mash with a potato masher until chunky. Add remaining half of beans, pork and sausage with the mashed beans and stir to mix.

4. Place half of bean pork mixture in slow cooker, place half of tomato mixture on top of that, put the rest of the bean-pork mixture on top of that and then the rest of the tomato mixture.

5. Put the cover on the slow cooker, turn on low and let cook for 5 hours.

6. When ready to serve, sprinkle with one teaspoon Parmesan and one teaspoon parsley.

So delightful!

 
Leave a comment

Posted by on January 31, 2013 in Low-Cal, Main Dishes, Pork


Tequila-Lime Turkey Chili – Healthy Super Bowl Recipe

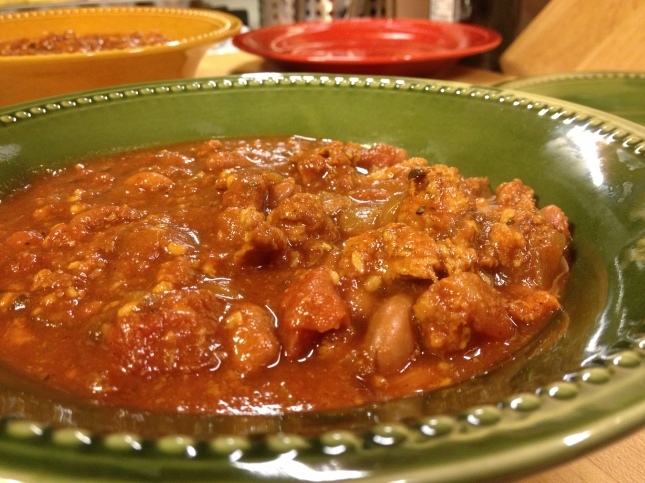
This chili is a low-cal recipe that combines chili AND booze! Also, it is another slow cooker recipe, so you can set it and forget it! Isn’t that phrase from some obnoxious infomercial? Meh, I really do not care enough to take the time and Google it. Anyway, this is a lighter version of chili that has an awesome bite of both lime and tequila. Despite being lighter, it is very hearty and filling. It is great with a topping of some avocado and a few extra squirts of lime juice. And, yes, it still goes well with cornbread. So, if you are looking for a slightly healthier super bowl option, here it is. It is 270 calories for a 1 1/3 cup serving. You will have to add in extra calories for other toppings you may want to include. And if you are like me and think this year’s Super Bowl is a rather boring matchup where you could not care less who wins, then at least you can have some awesome chili.

I unfortunately did not add any toppings and it looks boring...sorry.

I unfortunately did not add any toppings and it looks boring…sorry.

Tequila-Lime Turkey Chili
Adapted from America’s Test Kitchen Light and Healthy 2012

Ingredients
1 slice of hearty white sandwich bread, torn into quarters
2 tablespoons whole milk
1 pound 93% lean ground turkey
Salt and Pepper
2 onions chopped fine
2 teaspoons canola oil
2 tablespoons tomato paste
4 teaspoons chili powder –add extra or use chipotle chili powder if you want to bring on the heat
5-6 garlic cloves minced – or 2 great big squirts of the pre-minced stuff in a bottle
3-4 teaspoons ground cumin
2-3 teaspoons fresh minced oregano or ½ – 1 teaspoon dried oregano
½ teaspoon red pepper flakes
1 (15 oz) can tomato sauce
1 (15 oz) can pinto beans drained and rinsed
1 (14.5 oz) can diced tomatoes
¼ cup tequila
1 tablespoon low sodium soy sauce
1 tablespoon honey
1 teaspoon minced canned chipotle chili in adobo sauce
1 teaspoon grated lime zest plus 1 tablespoon lime juice
Avocado for toppingLime wedges for serving

Directions

1. Mash bread and milk into a fine paste in a large bowl with a fork. Mix in ground turkey and pepper to taste using hands until uniform.

2. Combine onions, oil, and ¼ teaspoon salt in a large skillet. Cover and cook on medium low heat until soft, 8-10 minutes.

3. Uncover, increase heat to medium, stir in tomato paste, chili powder, garlic, cumin, oregano and pepper flakes. Cook for about 30 seconds.

4. Stir in turkey mixture and cook, breaking up large pieces until all the pink is gone.

5. Stir in tomato sauce, scrap up any brown bits and cook for about a minute. Pour into slow cooker.

6. Stir beans, tomatoes, 3 tablespoons tequila, soy sauce, honey and chipotle into slow cooker. Cover and cook on LOW for 4-6 hours.

7. Once time is up, stir in remaining tablespoon tequila, lime zest and juice. Season to taste with salt and pepper.

8. Serve with your choice of toppings.

Eat, and maybe watch the Puppy Bowl with the Kitten Halftime Show instead…

 
Leave a comment

Posted by on January 28, 2013 in Low-Cal, Main Dishes, Turkey


Thai Chicken Pizza – What no cupcake recipe?

I feel like I post far too many baked goods, so here is an awesome pizza. This has become a household favorite. We would rather have this pizza over delivery any night of the week. It is just so tasty. It is so good that we packed all the ingredients, pizza stone and pizza cutter with us for our anniversary vacation at a cabin in the woods. We devoured it while playing game after game of Munchkin. You would not believe how many games I lost in a row! However, lugging all the equipment and ingredients was well worth it. Also, if you do not know Munchkin, I highly recommend that too.

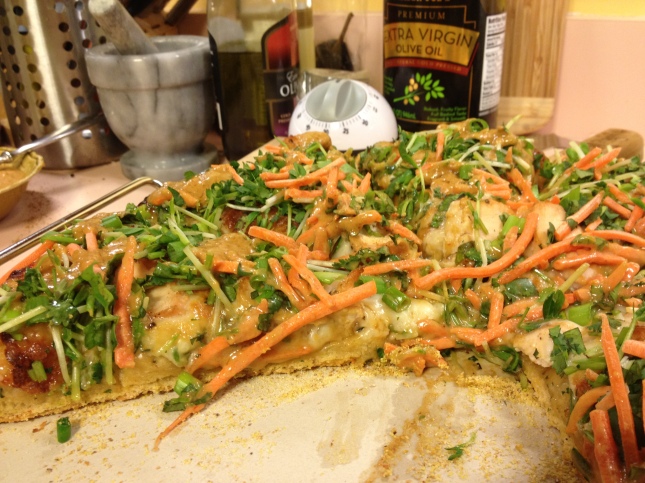
Perhaps not the best picture, but do not let it discourage you from making it.

Perhaps not the best picture, but do not let it discourage you from making it.

This recipe is adapted from The Pioneer Woman cookbook. The peanut sauce called for in this recipe is pretty good, but I found it was missing something important…lime juice. The peanut sauce needed some acidity and a little squirt of lime juice both in the sauce and on top of the pizza just before serving did the trick. It just brings out all the flavors so much more. I changed other things in this recipe including using my preferred pizza dough recipe and switching out some toppings. Other than making the dough, this recipe is incredibly simple. So, I hope you love it as much as we do.

Thai Chicken Pizza

Pizza Dough
Dough recipe adapted from Annie’s Eats

Feel free to get creative with the dough – added some chili powder or some lime zest. It is very versatile.

Ingredients
½ cup warm water (about 110°)
1 envelope (2 ¼ teaspoons) instant yeast
1 ¼ cups water, at room temperature
2 tablespoons extra-virgin olive oil
4 cups (22 oz.) bread flour, plus more for dusting
1 ½ teaspoons salt
olive oil or non-stick cooking spray for greasing the bowl

Directions:
1. Measure the warm water into a 2-cup liquid measuring cup. Sprinkle in the yeast and let stand until the yeast swells, about 5 minutes. Add the room temperature water and oil and stir to combine.
2. Put the flour and salt in the bowl of a stand mixer fitted with the paddle attachment. Mix slowly until combined.
3. Slowly add the liquid ingredients and continue to mix at low speed until the dough comes together.
4. Stop the mixer and replace the paddle with the dough hook. Knead until the dough is smooth and elastic, about 5 minutes. It will look kind of like an elongated ball mostly clinging to the hook.
5. Form the dough into a ball, put it in a deep oiled bowl, and cover with plastic wrap. Let rise until doubled in size, about 2 hours. Punch the dough to deflate it – my absolute favorite part.
6. Divide the dough in half, forming each half into a ball.
7. Place the dough balls in an oiled bowl and cover with a damp cloth. Let it rest for 10-30 minutes.
8. Follow the pizza cooking directions below. But place a pizza stone in the lower third of the oven and preheat the oven to 500°.
9. If not using right away: tightly wrap in plastic wrap and bung it in the freezer. It will defrost over night in the fridge for when you want to use it, or on the counter during the day.

Peanut Sauce
Adapted from the Pioneer Woman

Ingredients
4 garlic cloves peeled
3 tablespoons fresh minced ginger
¼ cup soy sauce
3 teaspoons sesame oil
1 teaspoon fish sauce
1 ½ cups smooth peanut butter
Chili paste to taste
½ cup warm water
Juice of two limes

Directions
1. In the bowl of a food processor add all of the ingredients and blend until smooth and creamy! I know it is super easy.
2. Set aside until after the pizza is cooked

The Whole Pizza
Adapted from the Pioneer Woman

Ingredients
2 boneless, skinless chicken breasts
Salt and Pepper
Thais sweet chili sauce
12-16 oz fresh mozzarella
1 cup pea shoots or alfafa sprouts
2 cups shredded carrots
2 cups chopped fresh cilantro
½ cup chopped peanuts
2 green onions, green part chopped
1 lime cut into wedges

Directions
1. Pat the chicken breasts dry and the season to taste with salt and pepper.
2. Grill (or sauté) chicken breasts until cooked through.
3. Once the chicken is cooled cut it into thin slices.
4. Dust a cutting board, or pizza peel, or as I found to work best and edgeless cookie sheet with cornmeal and place dough on top pushing it into that typical round pizza shape.
5. Spread as much Thai sweet chili sauce as you like on the dough.
6. Sprinkle with mozzarella cheese.
7. Top with chicken breast slices.
8. Transfer pizza to VERY hot pizza stone VERY carefully and cook for 12-15 minutes or until the crust is golden and cheese bubbly.
9. Carefully take pizza out of the oven and top with pea shoots, carrots, cilantro and peanuts.
10. Drizzle peanut sauce all over the pizza.
11. Squirt lime juice on top of that.
12. Serve with extra peanut sauce and lime wedges on the side.

DEVOUR

 
Leave a comment

Posted by on December 18, 2012 in Pizza


My Take on Take Five Bars

Not much could taste better than the combination of peanut butter, caramel, pretzels and chocolate. The Take Five Bar is literally the most perfect candy bar; it has everything that is wonderful and glorious in the world. So, I decided to translate the Take Five Bar into a cupcake. I know it has been done before, but I decided to make my own without looking at any other recipes. I would have loved to make these all for myself, but that is incredibly dangerous. I had been sitting on this for a few weeks when finally a couple friends of ours threw a house warming party! I finally had an excuse! Take Five Cupcakes Hooooooooooooo!

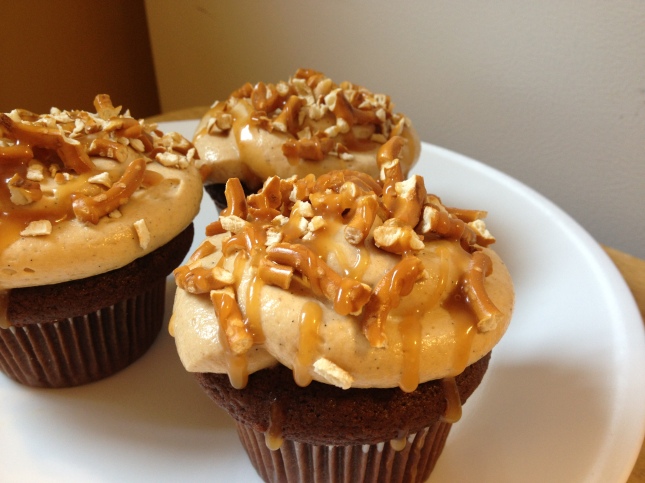
Scrumdiddlyumptious!

Scrumdiddlyumptious!

These turned out pretty well. I started with a Devil’s Food cupcake. Once they were baked and cooled I injected a salted caramel filling. I frosted them with a peanut butter cream cheese frosting upon which I then sprinkled crushed pretzels and then drizzled caramel over that. I think the only issue was that the pretzel bits soaked up moisture from the frosting and ended up tasting a bit stale. Next time I make these I might sprinkle the top with chocolate covered pretzels to avoid this same issue. Either way, these little buggers were ridiculously decadent and ridiculously tasty.

Take Five Cupcakes
A Cara Original

Devil’s Food Cupcakes
Adapted from Martha Stewart
Makes about 32 cupcakes

Ingredients:
¾ cup unsweetened Dutch-process cocoa powder
¾  cup hot water
3 cups all-purpose flour
1 teaspoon baking soda
1 teaspoon baking powder
1 ¼  teaspoons coarse salt
1 ½ cups (3 sticks) unsalted butter
2 ¼  cups sugar
4 large eggs, room temperature
1 tablespoon plus 1 teaspoon pure vanilla extract
4 oz 60 or 70% cacao chocolate –I usually use Ghirardelli
1 ½  cup sour cream, room temperature

Directions:
1. Preheat oven to 350 degrees. Line standard muffin tins with paper liners. Whisk together cocoa and hot water until smooth.

2. In another bowl, whisk together flour, baking soda, baking powder, and salt.

3. Melt butter with sugar in a saucepan over medium-low heat, stirring to combine. Remove from heat, and pour into a mixing bowl. With an electric mixer on medium-low speed, beat until mixture is cooled, 4 to 5 minutes. Add eggs, one at a time, beating until each is incorporated, scraping down sides of bowl as needed. Add vanilla, then cocoa mixture, and beat until combined.

4. Melt the 4 oz of chocolate in a double boiler (place a heat proof bowl over a pan of simmering water) or in microwave – I prefer double boiler method because it reduces the chance of burning the chocolate

5. Add flour mixture in two batches of the butter-sugar-cocoa mixture, alternating with the sour cream, and beating until just combined after each.

6. Add in melted chocolate and stir until combined.

7. Divide batter evenly among lined cups, filling each three quarters full. Bake, rotating tins halfway through, until a cake tester inserted in the centers comes out clean, about 20 minutes.

8. Transfer tins to wire racks to cool 15 minutes; turn out cupcakes onto racks and let cool completely.

Salted Caramel
From Brown Eyed Baker
Makes about 2 cups

Ingredients
2 cups granulated sugar
12 tablespoons unsalted butter, at room temperature, cut into pieces
1 cup heavy cream, at room temperature
1 tablespoon fleur de sel (or any other flaky sea salt)

Directions
1. Add the sugar in an even layer over the bottom of a large, heavy saucepan. Heat the sugar over medium-high heat, whisking it as it begins to melt. You’ll see that the sugar will begin to form clumps, but that’s okay. Just keep whisking and as it continues to cook, they will melt back down. Stop whisking once all of the sugar has melted, and swirl the pan occasionally while the sugar cooks.

2. Continue cooking until the sugar has reached a deep amber color. It should look almost a reddish-brown, and have a slight toasted aroma. This is the point where caramel can go from perfect to burnt in a matter of seconds, so keep a close eye. If you are using an instant-read thermometer, cook the sugar until it reaches 350 degrees F.

3. As soon as the caramel reaches 350 degrees, add the butter all at once. Be careful, as the caramel will bubble up when the butter is added. Whisk the butter into the caramel until it is completely melted.

4. Remove the pan from the heat and slowly pour the cream into the caramel. Again, be careful because the mixture will once again bubble up ferociously. Whisk until all of the cream has been incorporated and you have a smooth sauce. If you find you have large clumps in the sauce, put back over low heat and whisk vigorously. Add the fleur de sel and whisk to incorporate.

5. Pour through a fine mesh sieve into a clean bowl.

6. Set the sauce aside to cool for 10 to 15 minutes and then pour into your favorite glass jar and let cool to room temperature. You can refrigerate the sauce for up to 2 weeks. You’ll want to warm the sauce up before using.

7. Once cool, put a long filling tip into a pastry bag, filly pastry bag with caramel and then inject each cooled cupcake with the caramel. Stop filling the cupcake when you see the top bulge out. Reserve left over caramel sauce for drizzling on top of the frosted cupcakes.

Peanut Butter Cream Cheese Frosting
Adapted from Martha Stewart

Ingredients
18 ounces cream cheese
1 cup confectioners’ sugar
1 ½ teaspoon salt
3 cup creamy peanut butter (not natural)
1 ½ teaspoon pure vanilla extract
1 ½ cups heavy cream
2 cups (or so) crushed chocolate covered pretzels

Directions
1. Beat cream cheese and confectioners’ sugar with a mixer on medium speed. Add salt, then peanut butter, then vanilla.

2. Whisk cream until soft peaks form, and then fold into peanut butter mixture.

3. If using a stand mixer, put on the whisk attachment and whisk the frosting until light and fluffy, about 5 minutes.

4. Frost the cupcakes as you desire. Sprinkle crushed pretzels on top and then drizzle with remaining caramel sauce.

These cupcakes may cause an instant coronary or possibly a diabetic coma, but they are worth it.

 
Leave a comment

Posted by on December 13, 2012 in Cupcakes, Dessert


Pumpkin “Sage Student” (at least I hope) Cupcakes with Brown Sugar-Cream Cheese Frosting

I am writing this blog post as my students take their final exam. Literally, I am watching them all with their heads down, pens furiously writing and brows perpetually furrowed. This class has had a rough semester so I thought I would ease the pain for their final exam by making them cupcakes. I figured a cupcake with sage in it would give them wisdom…get it? Har har! Honestly, though I have found baking makes students far more receptive to both the teacher and to knowledge. It lightens the situation, earns the teacher some goodwill and perhaps, just perhaps they will learn more. I truly believe teachers, especially at the collegiate level, need to do it more often (class size permitting). I have had students tell me I am a legend among their friends because I brought the class some leftovers from my Compass Improv catering. They were doing me the favor by eating the leftovers and yet I somehow became the good teacher! But in the end, students just give me a wonderful excuse to bake.

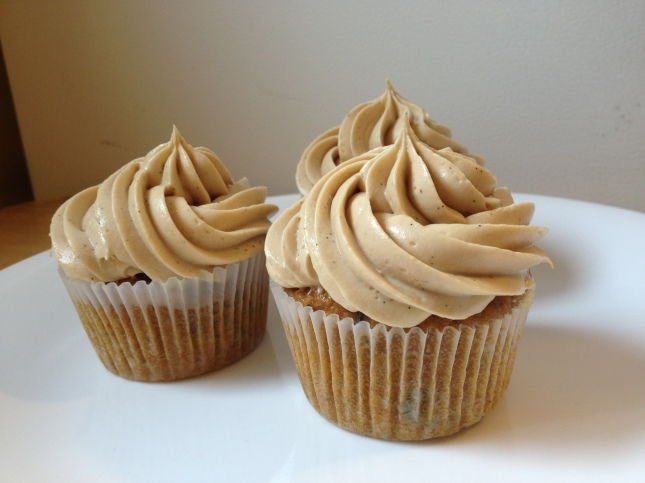
Trio of Cupcakes

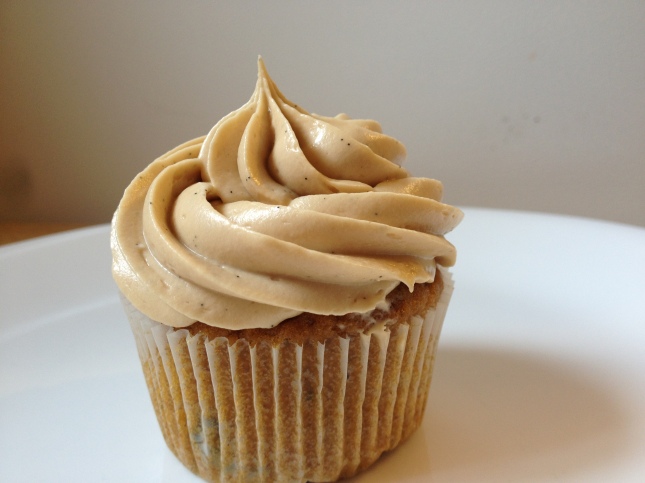
Look at those lovely vanilla bean seeds nestled in the frosting. Yum!


For this recipe I wanted some sort of Fall/Winter flavor without too much work. I have made these Pumpkin Sage cupcakes (and even a cake) before and they have always turned out flavorful and moist. They aren’t too sweet and even have a nice earthy flavor to them because of the sage. The typical recipe calls for fresh sage, which I normally always get but there seems to be a run on fresh sage in the grocery store – perhaps people are reattempting their failed sage-stuffing recipes from Thanksgiving in time for Christmas? So, this time I replaced the fresh sage with whole dried sage leaves and there seemed to be no difference in flavor or texture. DO NOT USE POWDER SAGE! In the end you get about 20 cupcakes. As for the frosting I tinkered a little bit by adding vanilla bean paste and some heavy whipping cream to lighten up the traditionally heavy base of a cream cheese frosting. I would recommend this for all cream cheese frostings to be honest. Makes things a bit more airy.

Anyway, here is another picture and the recipe. It is wonderful. Go try it

So pretty!

So pretty!

Pumpkin Sage Cupcakes with Brown Sugar-Cream Cheese Frosting
Adapted fro Martha Stewart

Ingredients for Cupcakes
1 ½ sticks unsalted butter at room temperature
1 2/3 cups all purpose flour
¼ cup fresh (or whole dried) sage leaves cut into chiffonade
2 teaspoons baking powder
1 teaspoon salt
½ teaspoon ground cinnamon
¼ teaspoon fresh ground nutmeg
1/8 teaspoon ground cloves
1 can pumpkin puree
1 cup packed light brown sugar
½ cup granulated sugar
2 large eggs

Directions for Cupcakes
1. Preheat oven to 325° and line a standard cupcake tin with wrappers.
2. In a saucepan over medium-low heat melt the butter. Once the butter has melted add the sage and cook until the butter turns golden brown. Take off the heat and allow to cool.
3. Whisk together flour, baking powder, salt, cinnamon, nutmeg and cloves into a bowl.
4. In a very large bowl combine the pumpkin pure, brown sugar and white sugar. Whisk until combined and then add the butter sage mixture. Whisk until incorporated. Beat in eggs one at a time.
5. Slowly whisk flour mixture into pumpkin mixture until just combined.
6. Evenly distribute batter among the cupcake tins.
7. Bake for 20-25 minutes or until a tester comes out clean
8. Make the Frosting

Ingredients for Brown Sugar-Cream Cheese Frosting
2 sticks unsalted butter at room temperature
16 oz cream cheese and room temperature
1 cup packed brown sugar
2 teaspoons vanilla bean paste
2 tablespoons heavy whipping cream

Direction for Brown Sugar-Cream Cheese Frosting
1. With an electric mixer on medium-high speed, beat butter, cream cheese and brown sugar until smooth.
2. Add in vanilla bean paste and beat until distributed.
3. Beat in heavy whipping cream and continue to beat until the frosting become a bit more fluffy and airy…yes I know this is rather subjects.
4. Frost your cooled cupcakes as desired!

 
Leave a comment

Posted by on December 6, 2012 in Cupcakes, Dessert, Frosting


A Patriotic Lemon Meringue Pie

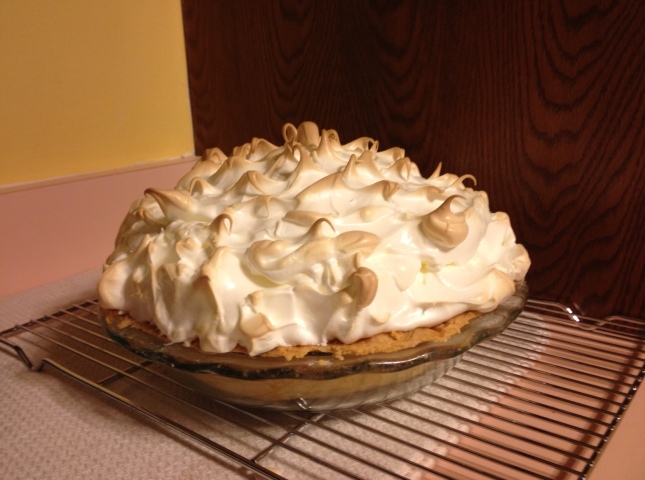
The weekend before Thanksgiving I threw/catered a party for a friend who wanted a surprise party for his husband. My friend gave me free reign over the menu with only two requests: it must be football/New England Patriots themed and there must be a lemon meringue pie. I went with football game day themed food. I had this whole wonderful menu laid out and executed. It consisted of pepperoni pizza pretzel bites, cheddar-bacon potato skins, buffalo chicken cups, smoked sausage with an apple-leek slaw and spicy dipping sauce, cheddar ale dip, 7-layer dip, Devil’s Food cupcakes with peanut butter cream cheese frosting and, or course, a lemon meringue pie. It was all delicious and wondering, but somehow I managed to only take a picture of the lemon meringue pie. Yes, I know, I am a terrible person and I am mad at my constant inability to photograph what I cook. So, lemon meringue pie is what you get this week, even though it is incredibly unseasonable.

The master piece!

The week and a half before the party I was recovering from a horrendous sinus infection. While I stayed in bed watching episode after episode of Grey's Anatomy, I hand made Patriots decorations

The week and a half before the party I was recovering from a horrendous sinus infection. While I stayed in bed watching episode after episode of Grey’s Anatomy, I hand made Patriots decorations

This is basically Martha Stewart’s recipe; however, I found that the piecrust recipe wasn’t enough, the lemon curd recipe wasn’t enough and even the meringue recipe wasn’t enough to fill a pie dish. I just decided everything needed to be doubled. Well to be honest, I forgot to double the crust recipe so that was too thin. I will not make that mistake again, and you get to learn from my foolishness. Anyway, the flavor of this pie is AMAZING! The birthday boy has said it is the best lemon meringue pie he has ever had, even better than anything he got back in Boston when he lived there. So, make it, make it now, and pretend it is actually summer and winter is not coming.

The fancy banner I made, and hey look, there are those cupcakes I mentioned!

The fancy banner I made, and hey look, there are those cupcakes I mentioned!

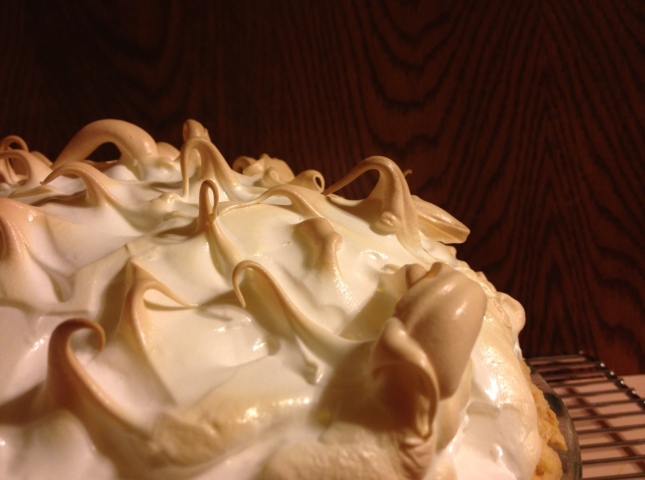
Another clearly necessary angle.

Another clearly necessary angle.

Lemon Meringue Pie
Adapted from Martha Stewart

Pie Crust
Ingredients
2 ½ cups all-purpose flour, plus more for rolling dough
1 teaspoon salt
1 heaping teaspoon sugar
2 sticks cold unsalted butter, cut into pieces
4 tablespoons ice water, plus 4 more, if needed – I needed it

Directions
1. Add flour, salt and sugar in a large bowl and mix with a fork.
2. Add the butter (cut up in pieces) to the flour mixture and blend with a pastry knife until you have crumbs no larger than a pea. You can also blend this in a food processor, but I like doing it by hand.
3. Add 4 tablespoons of water and mix together with a fork and then your hands until the dough comes together in a nice ball. You may have to add up to 4 tablespoons more for though dough to come together.
4. On a lightly floured surface roll dough out into a ¾ inch thick circle.
5. Carefully place rolled out dough in a 9 or 9 ½ inch pie dish gently pressing it into the dish. Trim off excess dough and make a nice crimp along the edge.
6. Chill in the fridge for about an hour.
7. Preheat oven to 350.
8. Take piecrust out of fridge, lay a sheet of parchment paper on top of it and place either pie weights or lots of dried beans on that. This is to weight the crust down while cooking to keep it from puffing up in the oven.
9. Bake for 45 minutes, remove parchment and pie weights or beans and then allow to cool completely.

Lemon Curd
Ingredients
2 cups sugar
2 tablespoons finely grated lemon zest, plus 1 1/3 cups fresh lemon juice
16 large egg yolks (reserve egg whites for the meringue!)
½ teaspoon coarse salt
2 cups water
½ cup cornstarch
2 ½ sticks unsalted butter (20 tablespoons), cut into 1/2-inch pieces

Directions
1. In a large saucepan, off heat, whisk together sugar, zest, and egg yolks; whisk in lemon juice and salt.
2. Whisk together 1 cup cold water and 1/4 cup cornstarch add to lemon mixture along with butter and place pan over medium-high. Cook, whisking constantly, until butter has melted, mixture is thick enough to coat the back of a spoon, and small bubbles form around the edge of pan, about 5 minutes (do not boil).
3. Remove pan from heat while continuing to whisk. Pour curd through a fine-mesh sieve into a glass bowl.
4. Pour immediately into cooled piecrust
5. Put in pie or cake carrier and place in the fridge for at least 3 hours or overnight.

The Meringue Part
Ingredients
16 egg whites – leftover from making your curd!
1 1/3 cups sugar
½ teaspoon coarse salt

Directions
1. Preheat oven to 350 degrees.
2. In a large bowl or in the bowl of your electric mixer fitted with the whisk attachment, combine egg whites, sugar and salt.
3. Using an electric hand or stand mixer, beat on medium-high until stiff peaks form.
4. Pile meringue on pie, making sure it touches the crust all around.
5. Bake until meringue begins to brown, 8 to 10 minutes.

Just look at those peaks!

Just look at those peaks!

And…VOILA…you are done. And if I do say so myself, my pie is prettier than the one on Martha’s website!

 
1 Comment

Posted by on November 27, 2012 in Dessert, Pies


Compass Cooking Part III: Chex Mix

For this event I wanted some nice finger foods and something people could just grab a handful of and munch on at their leisure. I thought of doing some sort of trail mix, but then I worried about nut allergies. I thought chips were too bland and just over done. Then I thought of something I had been craving a couple months ago…homemade Chex Mix.

The goodies right before their second stir

Each and every Christmas at my home growing up meant one thing without fail; my mother would make a great big double batch of Chex Mix using this recipe out of an ancient pamphlet like cookbook put out by the Chex Cereal Company. I am now the owner of this pamphlet that is barely holding together at this point and is coated in Chex Mix sauce splatter. The smell of cooking Chex Mix would always permeate our house around mid-December and it would always make my mouth water, and still does. I have fond memories of sitting in the living room with a fire in the fireplace, the 007 Days of Christmas on in the background and happily munching away on Chex Mix with my brother as we discussed our Christmas gift prospects. Such wonderful, simple times!

My mom had made her own changes the to recipe such as adding mini pretzel sticks and Cheerios to the mix, but the seasoning sauce always remained the same.  In my opinion the Cheerios are the best part because they soak up that sauce extremely well and then melt in your mouth leaving you with a savory delight. I thought how nice it would be to share a family food associated with such warm childhood memories with other people. I figured they would be able to taste the love. I too changed the recipe slightly. I removed the peanuts so I didn’t have to worry about peanut allergies. Also, I used the knotted pretzels rather than the sticks. I have stabbed the roof of my mouth with those damn mini pretzel sticks more times than I care to remember and I am sure that is the last thing and Improv Comedian would like to have happen right before they go on stage. Finally, I made mine a bit more saucy. This too was a big hit!

Chex Mix

Adapted from the ancient Chex Company Party Mix Recipe (no link it is so very old). However, this is now being called the Original Chex Party Mix. I beg to differ!

Ingredients
9 tablespoons of salted butter
1 ½ teaspoons seasoned salt
2 tablespoons Worcestershire Sauce
2 cups Corn Chex
2 cups Wheat Chex
2 cups Rice Chex
2 cups Cheerios
2 cups Pretzels

Directions
1. Preheat the oven to 250°
2. Combine the cereals and pretzels in a LARGE mixing bowl. If you do not have a large enough bowl to safely stir this large bulk, you will have to do it in smaller batches.
3. Combine the butter, seasoned salt and Worcestershire Sauce in a small saucepan over low heat until butter has melted. Stir to combine ingredients.
4. Pour the sauce mixture over the cereal mix and gently stir to evenly distribute sauce and coat all the cereal.
5. Pour the mix evenly onto two cookie sheets.
6. Bake for 45 minutes, stirring every 15 minutes.
7. Once baked, dump onto paper towels to dry.

The paper towel drying process

Try to stop at just one handful!

 
Leave a comment

Posted by on November 19, 2012 in Uncategorized


Compass Cooking Part II: Turkey Pepperoni Pizza and Basil Pesto Pinwheels

As promised, this post contains the awesome pinwheel recipes! I really liked making these for a large guest event. Each batch of dough made 40 pinwheels – 20 of each kind. I decided to make two types for the Compass Improv Festival: Turkey Pepperoni Pizza Pinwheels to suit both the meat eating performers and Basil Pesto Pinwheels for the vegetarians. Both kinds were amazing; however, I have learned that people will inhale anything that involves pepperoni. I always seemed to run a bit short on these during the festival. Basically, these are an easy crowd pleaser.

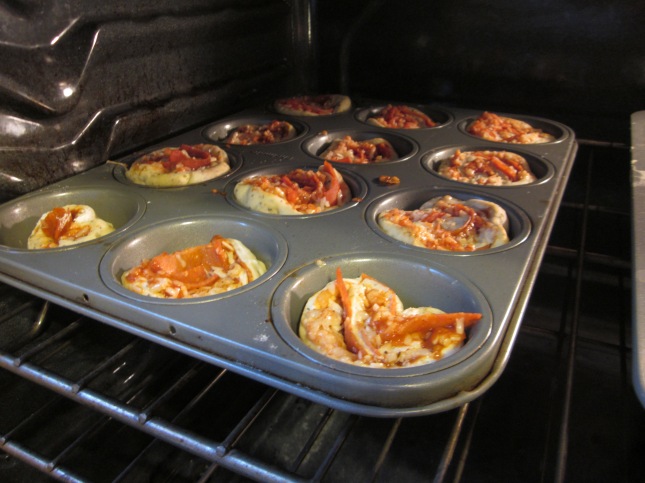
Turkey Pepperoni Pizza Pinwheels that were also dubbed Pepperoni Cupcakes

The beautiful thing about this recipe is that the dough base for the pinwheels is incredibly versatile and can be made days, weeks or even months before you need it and stored in the freezer. I have used this dough recipe for pizza crust and I have yet to have a batch fail. You can also add fun things to the dough. I have made a chili, lime cilantro version of this dough, and for the pinwheels I made it a black peppercorn parmesan dough. And the pinwheel recipe as a whole is extremely versatile. You can roll anything you want up in the dough. You could make sweet dough and roll cinnamon and sugar in for quick cinnamon rolls. You could do ham and Swiss or Rueben pinwheels with corned beef, sauerkraut, Swiss and Thousand Island dressing. But enough stargazing about the endless possibilities of pinwheels, here is the actual recipe.

Basil Pesto Version

Black Pepper Parmesan Pizza Dough
Dough recipe adapted from Annie’s Eats

Ingredients
½ cup warm water (about 110°)
1 envelope (2 ¼ teaspoons) instant yeast
1 ¼ cups water, at room temperature
2 tablespoons extra-virgin olive oil
4 cups (22 oz.) bread flour, plus more for dusting
1 ½ teaspoons salt
¾ cup finely grated Parmesano-Reggiano
2-3 teaspoons ground black pepper
olive oil or non-stick cooking spray for greasing the bowl

Directions:

1. Measure the warm water into a 2-cup liquid measuring cup.  Sprinkle in the yeast and let stand until the yeast swells, about 5 minutes.  Add the room temperature water and oil and stir to combine.
2. Put the flour and salt in the bowl of a stand mixer fitted with the paddle attachment. Mix slowly until combined.
3. Add in the Parmesan and black pepper and mix slowly until combined.
4. Slowly add the liquid ingredients and continue to mix at low speed until the dough comes together.

Sticky dough wad

5. Stop the mixer and replace the paddle with the dough hook.  Knead until the dough is smooth and elastic, about 5 minutes.  It will look kind of like an elongated ball mostly clinging to the hook.

Smoother, well-kneaded dough wad

6. Form the dough into a ball, put it in a deep oiled bowl, and cover with plastic wrap.  Let rise until doubled in size, about 2 hours.  Punch the dough to deflate it – my absolute favorite part.

Dough wad waiting to rise

That moment of relief when you know the yeast worked!

7. Divide the dough in half, forming each half into a ball.
8. Place the dough balls in an oiled bowl and cover with a damp cloth. Let it rest for 10-30 minutes.
9. If you want to make a pizza: place a pizza stone in the lower third of the oven.  Heat the oven to 500° for at least 30 minutes.  Then dust a cutting board, or pizza peel, or as I found to work best and edgeless cookie sheet with cornmeal and place dough on top pushing it into that typical round pizza shape. Top your pizza with what you like, slide it onto the hot pizza stone. This can be tricky and you will likely mess up the first time like I did, but that is ok. You will get a hang of it. Bake 8-12 minutes until crust is brown and cheese is that lovely golden color.
10. If making pinwheels: generously flour a flat surface and roll out the dough into a large, thin rectangle. This takes some work because the dough likes to spring back, but be patient. Then follow the directions below for the pinwheels and repeat with your second ball of dough.
11. If not using right away: tightly wrap in plastic wrap and bung it in the freezer. It will defrost over night in the fridge for when you want to use it, or on the counter during the day.

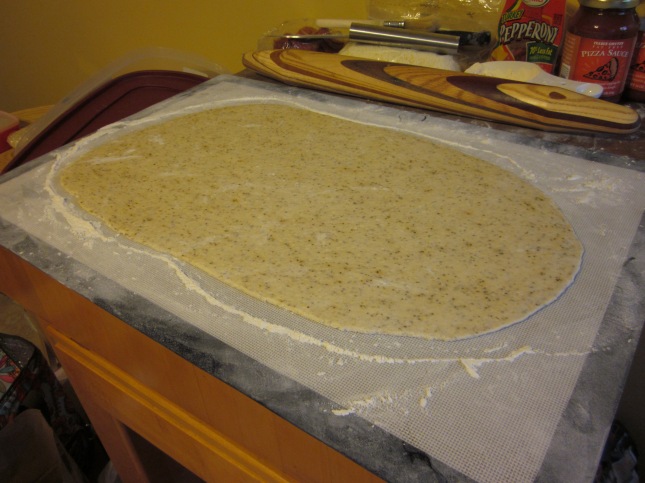
Ready for flattening

Ready for toppings

Turkey Pepperoni Pizza Pinwheels

Ingredients
1 batch of pizza dough (1 of the 2 balls of dough made from the recipe above)
Half can of pizza sauce – use ONLY pizza sauce and NOT regular pasta sauce. Pizza sauce is thicker and sticks to the pinwheels better
1 ½ cups Italian cheese mix
3 oz turkey pepperoni slices

Basil Pesto Pinwheels

Ingredients
1 batch of pizza dough (1 of the 2 balls of dough made from the recipe above)
¾ jar of basil pesto or whatever kind of pesto you like
1 ½ cups Italian cheese mix

Directions for both Turkey Pepperoni Pizza and Basil Pesto Pinwheels

1. Preheat oven to 350°.
2. Once the pizza dough is rolled out as described above, spread either the pizza sauce or the pesto depending on your choice. Allow a 1 ½ inch border without sauce (or any toppings) along one of the long edges.
3. Sprinkle with cheese and then evenly distribute the pepperoni if you are using it.

SaucyCheesy

Meaty

4. Now the tricky part – rolling it up. I found a pastry scrapper to be very helpful. Starting at the long edge WITHOUT the toppingless border, so the edge with toppings all along it, carefully, and tightly roll the dough pushing toppings in as need be. As you roll, be sure to brush off excess flour. No one likes eating baked, loose flour.

All rolled up and divided in half to better cut the roll evenly

5. Once rolled up, squeeze along the roll to just tighten things up.
6. With a very sharp knife, cut about ½ to ¾ inch slices for about 20 total slices.

Sliced roll

7. Place each slice in a cupcake tin and bake for 20-25 minutes.
8. Allow to cool slightly on a wire wrack and then serve immediately.

In oven goodness

This will be enjoyed by all!

 
2 Comments

Posted by on November 12, 2012 in Appetizers, Snacks


Compass Cooking Part I: Devil’s Food Cupcakes with Orange-Vanilla Bean Buttercream Frosting

Recently, I successfully pulled off my first large guest event. I have a hard timing bringing myself to call it a catering job because that sounds like it is my job, like I am a professional and like I knew what I was doing the whole time. Nothing could be further from the truth. When it was all said and done I provided food for about 200 people over 4 nights at several different venues for the Compass Improv Festival performers. It went more smoothly than I could have ever expected. Amazingly, I was not stressed while doing this and the cooking and baking all went off without a hitch. The only tragedy was breaking one of my small vintage Pyrex bowls. No worries, it has already been replaced!

Aaron and I behind the spread at the first night. The turkey pepperoni pizza pinwheels were probably the biggest hit. I stood there and watched one performer eat 3 in quick succession.

When asked if I would be willing to volunteer my time to make food for the performers during this Festival, I didn’t hesitate to say yes! I of course did not bother to think about all the time and effort it would take to pull this off in my small kitchen all by myself. Why would I ever think of that before agreeing? I had about a month to plan it all out, but to be honest I had no idea it would work until it did. I decided on a fairly simple menu that could be easily replicated each night during this four night Festival. I didn’t know the dietary preferences of any of the performers ahead of time, so I had to make it an accessible spread. I went with turkey pepperoni pizza pinwheels, basil pesto pinwheels, homemade Chex mix, caramelized onion dip with fresh veggies and crackers, buttermilk-vanilla bean mini-cupcakes with dark chocolate frosting and Devil’s food mini-cupcakes with orange-vanilla bean buttercream frosting. I will not go into detail about the calculation of ingredients and timing of cooking, though do feel free to ask if you are curious. However, I will show you a few fun pictures leading up to the cooking

I had to borrow 3 Kitchen Aid Mixers from 3 very generous friends to get the pinwheel dough and mini-cupcakes done in a timely fashion.

My army of Kitchen Aid Mixers

These are just the ingredients to make the cupcakes. I kind of wish I had stacked in the onions for the dip, fillings for the pinwheels, and endless boxes of cereal for the Chex mix. Oh well, next time…

Soooooo much butter!!!!!

All of the baked mini-cupcakes lined up, waiting for frosting.

At the time, the lines of cupcakes seemed never ending.

The recipe I share with you today is one that you already half know. I used my Devil’s Food cupcake recipe. You can find it here. I will note, that one batch of this batter makes 24ish normal sized cupcakes and 96 mini cupcakes. I kind of thought it would only make 48 mini cupcakes – I was WAY off. This just meant I had lots of extras with which to delight my boyfriend and students. One final note on the cupcakes: reduce cook time to 10-12 minutes if using a mini cupcake pan.

Devil’s Food Cupcakes with Orange-Vanilla Bean Buttercream Frosting

Orange-Vanilla Bean Buttercream Frosting
I came up with this frosting recipe by adding to my base buttercream. It tasted like a creamsicle! It was unreal and complimented the Devil’s Food to a “T”!
Adapted from Martha Stewart

Ingredients:
6 large egg whites
1 1/2 cups sugar
1 1/4 pounds (5 sticks) unsalted butter, softened
1 tablespoon Vanilla Bean Paste
1-2 teaspoons Pure Orange Extract – adjust this to taste, I prefer a stronger orange flavor

Directions:
1.  Place whites and sugar in a heatproof mixer bowl set over a pan of simmering water. Whisk until sugar dissolves and mixture registers, I test it by putting a small drop of the mixture between my fingers. If it is still gritty, it needs to stay on the heat longer, if it is perfectly smooth then move on.
2. Remove from heat, and whisk on high speed until mixture is cool and stiff peaks form, about 6-10 minutes. It is very important that stiff peaks form otherwise your frosting will fall apart. If butter starts to clot, put over heat a little bit until it goes back into solution.
3. Beat in vanilla bean paste and pure orange extract.
4. If you like, add in food coloring at this time
5. Decorate the cupcakes with this frosting as you choose

Next time, I shall regale you with Pinwheel tales!

 
2 Comments

Posted by on November 7, 2012 in Cupcakes, Dessert, Frosting